들어가며
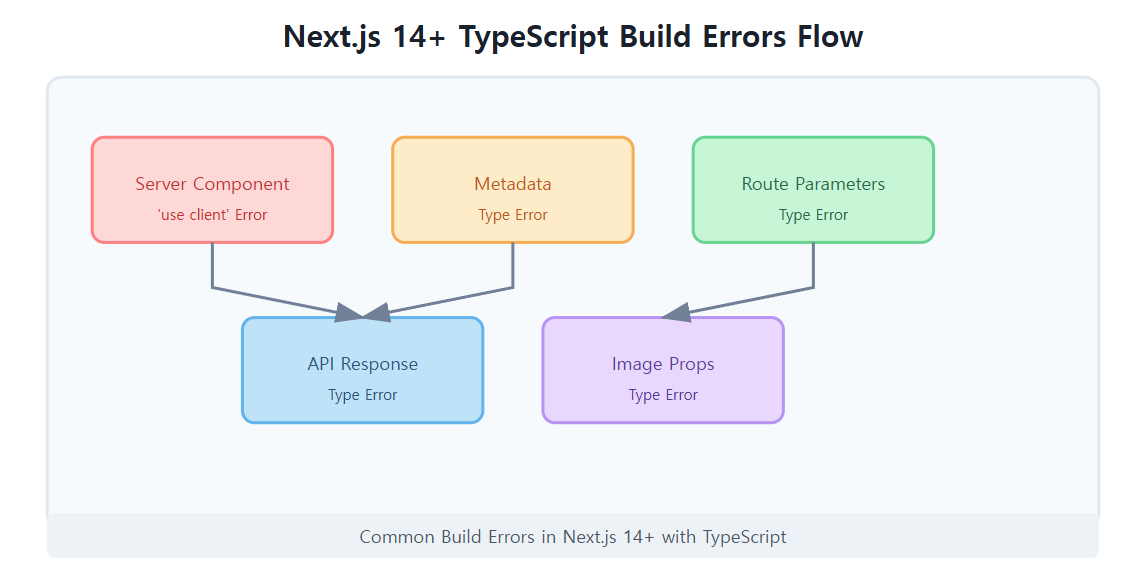
Next.js 14 버전이 출시되면서 많은 개발자들이 TypeScript와 함께 사용하는 과정에서 다양한 빌드 에러를 경험하고 있습니다. 이 글에서는 가장 빈번하게 발생하는 5가지 주요 빌드 에러와 그 해결 방법을 상세히 알아보겠습니다.
Next.js 14의 주요 변경사항
Next.js 14는 이전 버전과 비교하여 몇 가지 중요한 변경사항을 도입했습니다:
- App Router가 기본 라우팅 시스템으로 채택
- 서버 컴포넌트(Server Components)가 기본값으로 설정
- 메타데이터 API의 개선
- 향상된 타입 안정성
이러한 변경사항들로 인해 TypeScript와 함께 사용할 때 새로운 형태의 빌드 에러들이 발생하고 있습니다.
주요 빌드 에러 및 해결 방법
1. Server Component에서 ‘use client’ 지시어 관련 에러
문제 상황
서버 컴포넌트에서 클라이언트 사이드 기능을 사용하려 할 때 발생하는 가장 일반적인 에러입니다.
1
2
3
4
5
6
7
8
| // ❌ 에러 발생 코드
import { useState } from 'react'
export default function ServerComponent() {
// Error: useState can only be used in Client Components
const [count, setCount] = useState(0)
return <div>{count}</div>
}
|
원인 분석
Next.js 14에서는 모든 컴포넌트가 기본적으로 서버 컴포넌트로 취급됩니다. 서버 컴포넌트에서는 브라우저 API나 React의 상태 관리 훅을 사용할 수 없습니다.
해결 방법
1
2
3
4
5
6
7
8
| // ✅ 해결 방법
'use client'
import { useState } from 'react'
export default function ClientComponent() {
const [count, setCount] = useState(0)
return <div>{count}</div>
}
|
모범 사례
1
2
3
4
5
6
7
8
9
10
11
12
13
14
15
16
17
18
19
20
21
22
| // 부모 (서버 컴포넌트)
import ClientCounter from './ClientCounter'
export default function ParentServerComponent() {
return (
<div>
<h1>서버 컴포넌트</h1>
<ClientCounter />
</div>
)
}
// 자식 (클라이언트 컴포넌트)
'use client'
export default function ClientCounter() {
const [count, setCount] = useState(0)
return (
<button onClick={() => setCount(c => c + 1)}>
Count: {count}
</button>
)
}
|
2. 메타데이터 타입 관련 에러
문제 상황
페이지나 레이아웃에서 메타데이터를 정의할 때 발생하는 타입 에러입니다.
1
2
3
4
5
| // ❌ 에러 발생 코드
export const metadata = {
title: 'My App',
description: 'Description' // Type error
}
|
해결 방법
1
2
3
4
5
6
7
8
9
10
11
12
| // ✅ 해결 방법
import type { Metadata } from 'next'
export const metadata: Metadata = {
title: 'My App',
description: 'Description',
openGraph: {
title: 'My App',
description: 'Description',
type: 'website'
}
}
|
고급 설정 예시
1
2
3
4
5
6
7
8
9
10
11
12
13
14
15
16
| import type { Metadata } from 'next'
export function generateMetadata({ params }: Props): Metadata {
return {
title: `Page ${params.id}`,
description: `Dynamic description for page ${params.id}`,
robots: {
index: true,
follow: true
},
viewport: {
width: 'device-width',
initialScale: 1
}
}
}
|
3. 동적 라우트 파라미터 타입 에러
문제 상황
동적 라우팅에서 파라미터 타입이 제대로 정의되지 않았을 때 발생합니다.
해결 방법
1
2
3
4
5
6
7
8
9
10
11
| // ✅ 기본적인 해결 방법
interface PageProps {
params: {
id: string
}
searchParams: { [key: string]: string | string[] | undefined }
}
export default function Page({ params, searchParams }: PageProps) {
return <div>Post: {params.id}</div>
}
|
타입 가드 활용
1
2
3
4
5
6
7
8
9
10
11
12
13
14
15
16
| // ✅ 타입 가드를 활용한 고급 해결 방법
interface PostParams {
id: string
}
function isValidPostParams(params: any): params is PostParams {
return typeof params.id === 'string'
}
export default function Page({ params }: { params: unknown }) {
if (!isValidPostParams(params)) {
throw new Error('Invalid parameters')
}
return <div>Post: {params.id}</div>
}
|
4. API 라우트 응답 타입 에러
문제 상황
API 라우트에서 응답을 반환할 때 타입 에러가 발생하는 경우입니다.
해결 방법
1
2
3
4
5
6
7
| // ✅ 기본적인 해결 방법
import { NextResponse } from 'next/server'
import type { NextRequest } from 'next/server'
export async function GET(request: NextRequest) {
return NextResponse.json({ message: 'Hello' })
}
|
에러 처리를 포함한 고급 예시
1
2
3
4
5
6
7
8
9
10
11
12
13
14
15
16
17
18
19
20
21
22
23
24
25
26
27
28
29
30
31
| import { NextResponse } from 'next/server'
import type { NextRequest } from 'next/server'
interface ErrorResponse {
error: string
status: number
}
interface SuccessResponse {
data: any
status: number
}
type ApiResponse = SuccessResponse | ErrorResponse
export async function GET(
request: NextRequest
): Promise<NextResponse<ApiResponse>> {
try {
const data = await fetchSomeData()
return NextResponse.json({
data,
status: 200
})
} catch (error) {
return NextResponse.json(
{ error: error.message, status: 500 },
{ status: 500 }
)
}
}
|
5. Image 컴포넌트 속성 타입 에러
문제 상황
Next.js의 Image 컴포넌트 사용 시 필수 속성이 누락되어 발생하는 에러입니다.
기본 해결 방법
1
2
3
4
5
6
7
8
9
10
11
12
13
14
| // ✅ 정적 이미지
import Image from 'next/image'
export default function MyImage() {
return (
<Image
src="/image.jpg"
alt="My Image"
width={500}
height={300}
priority
/>
)
}
|
동적 이미지 처리
1
2
3
4
5
6
7
8
9
10
11
12
13
14
15
16
17
18
19
20
21
22
23
| // ✅ 동적 이미지 처리
import Image from 'next/image'
interface ImageProps {
src: string
alt: string
}
export default function DynamicImage({ src, alt }: ImageProps) {
return (
<div className="relative w-full h-64">
<Image
src={src}
alt={alt}
fill
style=objectFit: cover
sizes="(max-width: 768px) 100vw, (max-width: 1200px) 50vw, 33vw"
quality={75}
loading="lazy"
/>
</div>
)
}
|
프로젝트 설정 최적화
TypeScript 설정 (tsconfig.json)
1
2
3
4
5
6
7
8
9
10
11
12
13
14
15
16
17
18
19
20
21
22
23
24
25
26
27
| {
"compilerOptions": {
"target": "es5",
"lib": ["dom", "dom.iterable", "esnext"],
"allowJs": true,
"skipLibCheck": true,
"strict": true,
"noEmit": true,
"esModuleInterop": true,
"module": "esnext",
"moduleResolution": "bundler",
"resolveJsonModule": true,
"isolatedModules": true,
"jsx": "preserve",
"incremental": true,
"plugins": [
{
"name": "next"
}
],
"paths": {
"@/*": ["./src/*"]
}
},
"include": ["next-env.d.ts", "**/*.ts", "**/*.tsx", ".next/types/**/*.ts"],
"exclude": ["node_modules"]
}
|
ESLint 설정 (.eslintrc.json)
1
2
3
4
5
6
7
8
9
10
11
12
| {
"extends": [
"next/core-web-vitals",
"plugin:@typescript-eslint/recommended"
],
"rules": {
"@typescript-eslint/no-explicit-any": "error",
"@typescript-eslint/no-unused-vars": ["error", { "argsIgnorePattern": "^_" }],
"react-hooks/rules-of-hooks": "error",
"react-hooks/exhaustive-deps": "warn"
}
}
|
디버깅 도구 및 테크닉
1. 타입 체크 명령어
1
2
3
4
5
| # 타입 에러 확인
npx tsc --noEmit
# 상세한 빌드 로그 확인
next build --debug
|
2. VS Code 설정
1
2
3
4
5
6
| {
"typescript.tsdk": "node_modules/typescript/lib",
"typescript.enablePromptUseWorkspaceTsdk": true,
"editor.defaultFormatter": "esbenp.prettier-vscode",
"editor.formatOnSave": true
}
|
3. 유용한 디버깅 도구
- TypeScript Error Translator
- React Developer Tools
- Next.js DevTools
성능 최적화 팁
- 코드 분할
1
2
3
4
| // ✅ 동적 임포트 사용
const DynamicComponent = dynamic(() => import('./HeavyComponent'), {
loading: () => <p>Loading...</p>
})
|
- 이미지 최적화
1
2
3
4
| // ✅ 이미지 최적화 설정
const imageLoader = ({ src, width, quality }) => {
return `https://example.com/${src}?w=${width}&q=${quality || 75}`
}
|
- 캐싱 전략
1
2
| // ✅ 페이지 캐싱 설정
export const revalidate = 3600 // 1시간마다 재검증
|
마치며
Next.js 14와 TypeScript를 함께 사용할 때 발생하는 빌드 에러들은 대부분 새로운 기능과 타입 시스템의 엄격한 검사로 인해 발생합니다. 이러한 에러들은 개발 과정에서 더 안정적인 코드를 작성하도록 도와주는 가이드라인으로 생각할 수 있습니다.
앞으로도 Next.js와 TypeScript는 계속 발전할 것이며, 이에 따라 새로운 형태의 에러들이 발생할 수 있습니다. 하지만 이 글에서 다룬 기본적인 문제 해결 접근 방식을 이해하고 있다면, 새로운 에러들도 충분히 해결할 수 있을 것입니다.
참고 자료